3️⃣ Steps to Run Multiple Jobs Sequentially in Abaqus | Run Abaqus Job in Command Prompt
If you are new in FEM and FEA, absolute beginner in Abaqus, or just want to learn the Abaqus like a pro and organize your info about it, the “Abaqus for beginners package” is the best option for you.
Start from the basics, an introduction to various Abaqus modules, it covers essential techniques for modeling, result extraction, and reporting. + Advanced topics such as UMAT and Python scripting from the beginning.
 |
|
1. How to run Abaqus job in command prompt?
Once you’ve set up an input file, you can run Abaqus jobs directly from the command prompt without opening the graphical interface.
To run Abaqus job in Command Prompt you need to take several steps:
- Open command prompt window;
- change working directory in command prompt window (if you need);
- run the command: abaqus job=jobname;
- and wait for completion.
To run a job, simply navigate to the folder containing the .inp file and enter:
abaqus job=jobname
For example:
abaqus job=simulation1
This command will start running the simulation, and all output files will be generated in the current directory. You can monitor the job’s progress through the .log file created in the same folder.
But, let’s dive deeper and see all of these steps in detail and more.
2. How to Open command prompt window?
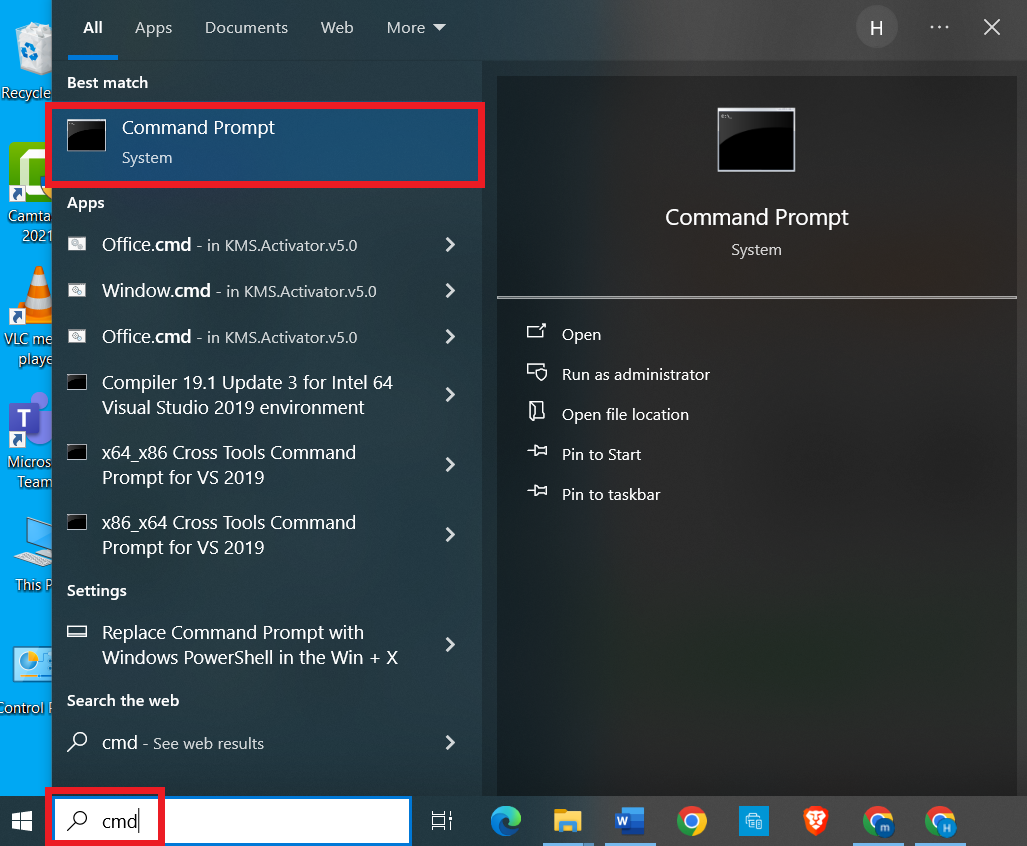
The first step in running an Abaqus job is opening the command prompt window. For Windows users, this can be done in a few easy steps:
- Search “cmd”: Press the “Windows” key and type “cmd” in the search bar. Hit enter, and the command prompt window will appear.
- Direct Selection: Alternatively, you can navigate through the start menu by selecting “Command Prompt” from your programs.
Once the black command window is open, you’re ready to enter commands. The command prompt window will execute any input in the directory shown in its header.
Figure 1: Opening command prompt window
2.1. How to change working directory in command prompt window?
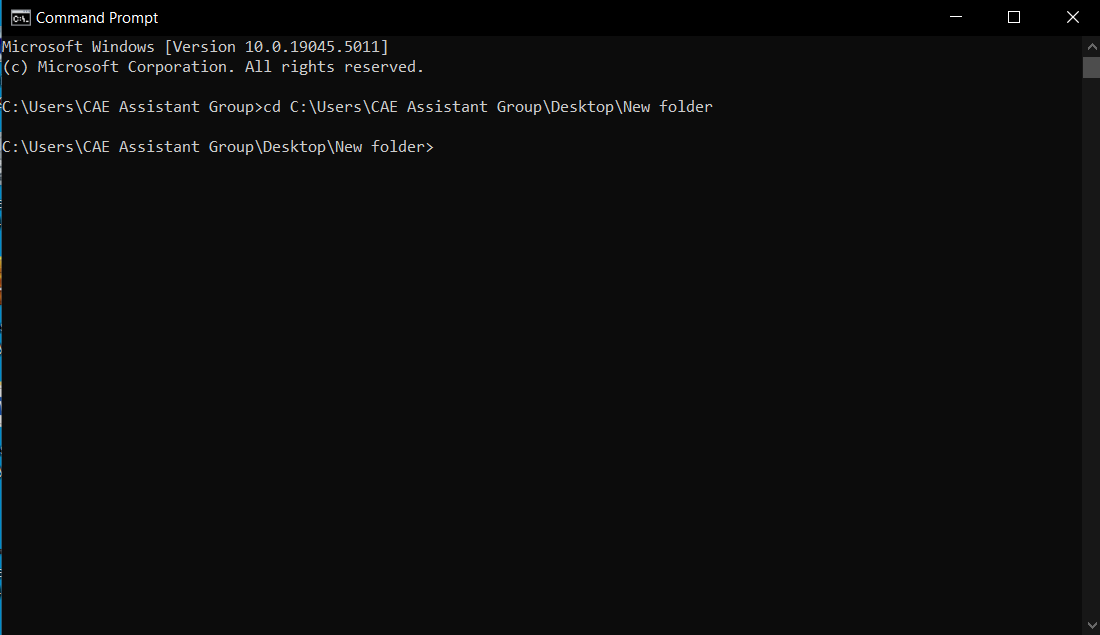
By default, the command prompt opens in the user’s home directory. To run Abaqus jobs in a specific folder, you must change the working directory. Use the “cd” (change directory) command to do this.
Figure 2: changing working directory
This will change the directory to your projects folder.
Pro tip: you can shift-right-click on a folder and select “Open Command Window Here” to automatically start in your desired location. This trick is a major time-saver when navigating to complex folder structures!
3. How to Open or call different Abaqus versions in command prompt window?
If you have multiple versions of Abaqus installed, it’s important to specify which version to use. By default, the command “abaqus” calls the latest installed version. However, if you need a specific version, such as Abaqus 2018, you can easily change the command.
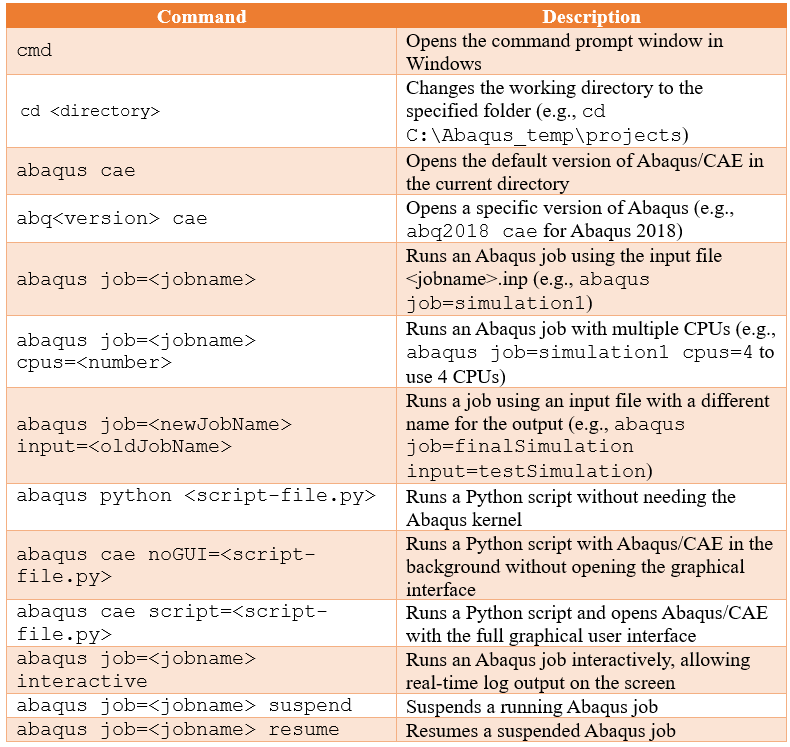
To call a specific version, use “abq2018 cae” command; This opens Abaqus 2018. The same format works for different versions (e.g., abq2019 cae for Abaqus 2019).
For convenience, you can modify the default Abaqus version by editing the abaqus.bat file, typically located in C:\SIMULIA\Commands. This way, the desired version always opens with the generic abaqus command.
Each version of ABAQUS has a specific command for execution. Starting with ABAQUS 2016, the default command format is “abqxxxhfy,” where “xxx” represents the release year and “y” indicates the hotfix number. For instance, to run the general release of ABAQUS 2017, the command would be “abq2017.” Versions released before 2016 are identified by version numbers. For example, the command for ABAQUS 6.14-1 is “abq6141.”
4. How to run Abaqus job with different cpus?
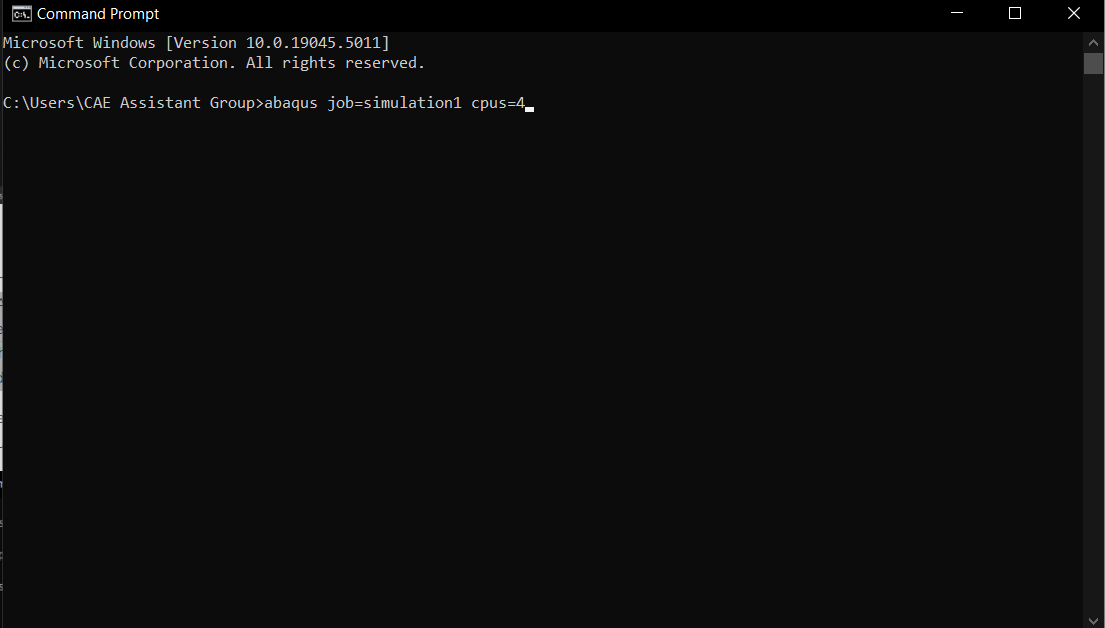
When working with large or computationally intensive simulations, it’s beneficial to utilize multiple CPUs to speed up the process. To do this, include the cpus option in your command.
For example, to run a job using four CPUs, use:
abaqus job=simulation1 cpus=4
This will distribute the computation across four processors, allowing for faster processing times. The number of CPUs you can use depends on your system’s resources and Abaqus licensing.
Figure 3: Running Abaqus job with multiple cpus
5. How to run Abaqus job using different name?
Sometimes, you may want to run a job but save the output files under a different name. This can be helpful when experimenting with different configurations without overwriting previous results.
To achieve this, use the following command:
abaqus job=newJobName input=oldJobName
For example:
abaqus job=finalSimulation input=testSimulation
In this case, the input file testSimulation.inp is used, but the output files will be saved as finalSimulation.odb, finalSimulation.log, etc.
6. How to run Python scripts in command prompt?
Abaqus also supports running Python scripts from the command line, which is useful for automating tasks or performing custom post-processing on your results.
To run a Python script that doesn’t require the Abaqus kernel, simply use:
abaqus python script-file.py
If the script needs to interact with Abaqus/CAE but without opening the graphical interface, use:
abaqus cae noGUI=script-file.py
This allows you to run your script efficiently in the background. If you need the full CAE interface while running the script, the following command opens both the interface and the script:
abaqus cae script=script-file.py
Running Abaqus jobs from the command prompt offers a streamlined, flexible alternative to the graphical interface. Whether you’re calling different versions, using multiple CPUs, or executing Python scripts, mastering these command-line tools can greatly improve your productivity and efficiency.
Now, let’s talk about how to run multiple jobs in Abaqus.
Don’t know Python at all?!🤦♂️🤷♀️ NO Worries!!😉 because with the “Python in Abaqus” package not only you’ll learn the python from the beginning and basics, also you will learn it how to use it in Abaqus with practical examples.
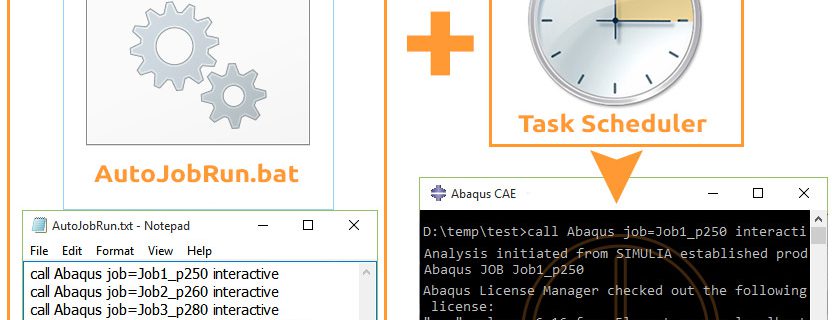
Are you tired of spending countless hours running multiple Abaqus jobs? In this article, we’ll guide you through automating your Abaqus queue job efficiently. Learn how to generate .inp files, create a customized Abaqus batch file, and utilize the Windows Task Scheduler for an automated Abaqus batch run. Say goodbye to manual job submissions and hello to a streamlined Abaqus job scheduler, Enabling you to Abaqus run multiple jobs sequentially without the hassle.
7. Abaqus Job Module: Controlling Your Simulation Run
The Abaqus Job module is the command center for launching and managing your finite element analysis (FEA) simulations. Here, you define the tasks for Abaqus to execute, including:
- Input file generation: The Job module translates your model definitions (parts, materials, interactions, etc.) from previous Abaqus modules into a text-based input file (.inp) that Abaqus understands.
- Analysis execution: You initiate the simulation process from here, triggering Abaqus to solve the complex equations governing your model’s behavior.
- Output control: The Job module allows you to specify the data you want to extract from the analysis, like stress and strain values at specific locations.
Abaqus queue Jobs
8. Introduction to Abaqus Job Scheduler : Generating .inp Files
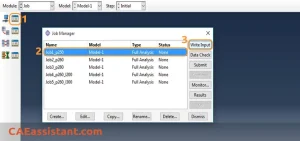
After changing any parameter of your model, create a job and then in Job Manager window, instead of selecting Submit, just press Write Input:
Repeat that for every job you defined.
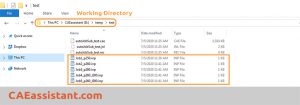
Now, you can find as many .inp files in the Working Directory as jobs you defined before, ready for the Abaqus job scheduler and managing Abaqus queue jobs.
Read More: What is inp File Abaqus and How to Open inp File in Abaqus? Running .inp file Abaqus
Now, It’s time to simplify your workflow and transition to Abaqus run multiple jobs sequentially for increased efficiency.
9. Creating a Customized Batch File | Creating Abaqus Batch Files
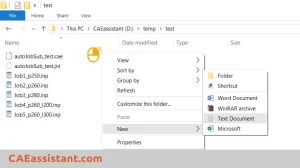
Then, we need to create a .txt file (for example, AutoJobRun.txt), enter some commands, and then save the file and change its ending to .bat. First, right click on any empty space and select New > New Text Document:
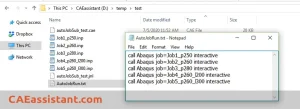
Now, Open the created file. You must enter a line like the following for each job:
call Abaqus job=job_name interactive
Where you replace job_name with your selected name for every job:
The phrase interactive is really important to run jobs sequentially and after completing the former job.
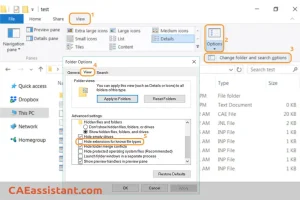
Close the file and Save it. Now, we should change its extension to .bat. If you can not see the extension of the files (in Windows 8 and upper), just go to View tab > Options > Change folder and search options. Then, in the opened window, go to the View tab and uncheck the Hide extensions for known file types
Now we have a file named AutoJobRun.bat, which is an Abaqus batch file.
This .bat ending file is called a batch file. A batch file is a script file in Microsoft Windows. It consists of a series of commands to be executed by Windows, stored in a plain text file. Here, you have created an Abaqus batch file scheduling jobs in Abaqus.
[learn_press_recent_courses]
10. Automate Running Abaqus Queue Jobs | Abaqus Batch Run
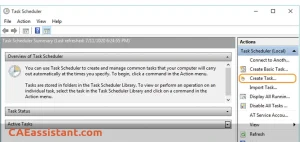
For this purpose, we have to use Windows Task Scheduler. Find the Task Scheduler app in Windows and run it. On the left panel, choose Create Task… Abaqus queue Jobs
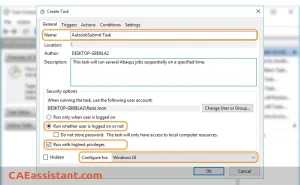
Then, in the appeared window, type a name for your task and a description if you wish. Also, select Run whether the user is logged in or not and tick Run with the highest privileges. You should select Windows 10 in Configure for: menu.
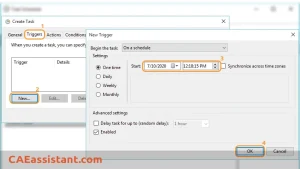
Then, switch to the Triggers tab, select New, and choose the desired day and time to Start running jobs automatically:
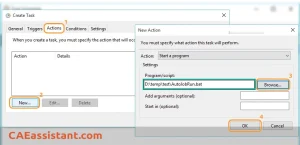
Switch to the Actions tab, select New, and Browse for Abaqus batch file we created before:
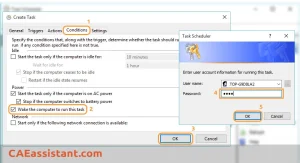
And finally, switch to the Conditions tab and tick the Wake the computer to run this task option:
With this selection, even if the computer is shut down, it will wake at the selected time. However, I suggest to Hibernate your computer and plugging it in.
Press OK. If the program asks for your account Password, type it.
11. Techniques for Speedy Simulations:
- Hardware Optimization: Ensure you have sufficient RAM to accommodate your model’s complexity. Utilize multi-core processors by enabling parallel processing in Abaqus. Consider using high-performance computing clusters for exceptionally demanding simulations.
- Mesh Refinement: A coarse mesh might lead to inaccurate results and longer run times. Conversely, an excessively fine mesh offers diminishing returns and slows down the simulation. Refine the Abaqus mesh in critical areas where stress concentrations are expected, and employ a coarser mesh in less critical regions.
- Submodeling: Complex simulations with intricate details can be computationally expensive. Submodeling isolates a specific region of interest with a finer mesh for detailed analysis, while the surrounding area uses a coarser mesh, reducing overall computation time.
- Simplifications: Evaluate if specific model features are crucial for the analysis. Removing unnecessary details or simplifying complex geometries can streamline the simulation process.
12. Preventing System Hiccups:
- Close Background Applications: Unnecessary programs running in the background consume system resources like RAM and CPU, potentially slowing down Abaqus. Close any programs you don’t need while running a simulation.
- Disable Antivirus/Firewall Temporarily: Antivirus software or firewalls might interfere with Abaqus, especially during file I/O operations. Consider temporarily disabling them during the simulation (remember to re-enable them afterward for security).
- Optimize Virtual Memory: If your physical RAM is insufficient, the operating system utilizes virtual memory on your hard drive. However, hard drive access is much slower than RAM. Ensure you have enough free space on your hard drive for virtual memory to function effectively, but avoid relying solely on it for optimal performance.
By effectively utilizing the Abaqus Job module and implementing these techniques, you can achieve faster simulation run times and minimize system issues during Abaqus analysis.
This was all about scheduling jobs in Abaqus, including managing Abaqus queue jobs and automating Abaqus batch run(Abaqus run multiple jobs sequentially). Implement this method in Abaqus projects. Enroll in our free Abaqus course to explore practical projects.
Conclusion
Frequent asked questions
How to Run Multiple Jobs Sequentially in Abaqus?
Efficiently run multiple Abaqus jobs in three simple steps: 1. Generate .inp files of your projects 2. Create a customized batch file for sequential job execution. 3. Automate using the Windows Task Scheduler for efficient management.


fabulous article
If you desire to grow your experience just keep visiting this website and be updated with the latest news posted here.
I am truly happy to read this blog posts which consists of plenty of valuable data, thanks for providing these kinds of information. Diana Farleigh Modestine